

ESP32-8048S043備忘録 Y.Okamoto 2023-02-14
まず
https://lang-ship.com/blog/work/esp32-8048s043/
を参考にビルドから
ArduinoIDEでライブラリの管理からPSRamのたなかまさゆきさんビルドのライブラリを入れる.
次にToolからBoardを選ぶが,
ESP32 Aruinoで
ESP32-S3-DevではなくPSRAMを使うために
ESP32-S3-Boxを選ぶ.
あと上記ページのプラットフォームボタンから
esp32s3box.json
https://github.com/lovyan03/LovyanGFX/blob/0.5.0/src/lgfx_user/LGFX_ESP32S3_RGB_ESP32-8048S043.h
より
LGFX_ESP32S3_RGB_ESP32-8048S043.h
をこれも同一フォルダに格納.
そして
https://lang-ship.com/blog/work/esp32-8048s043/#toc4
のシンプルスケッチ例を基板に送るが,エラーとなる.(⇒今ここ)
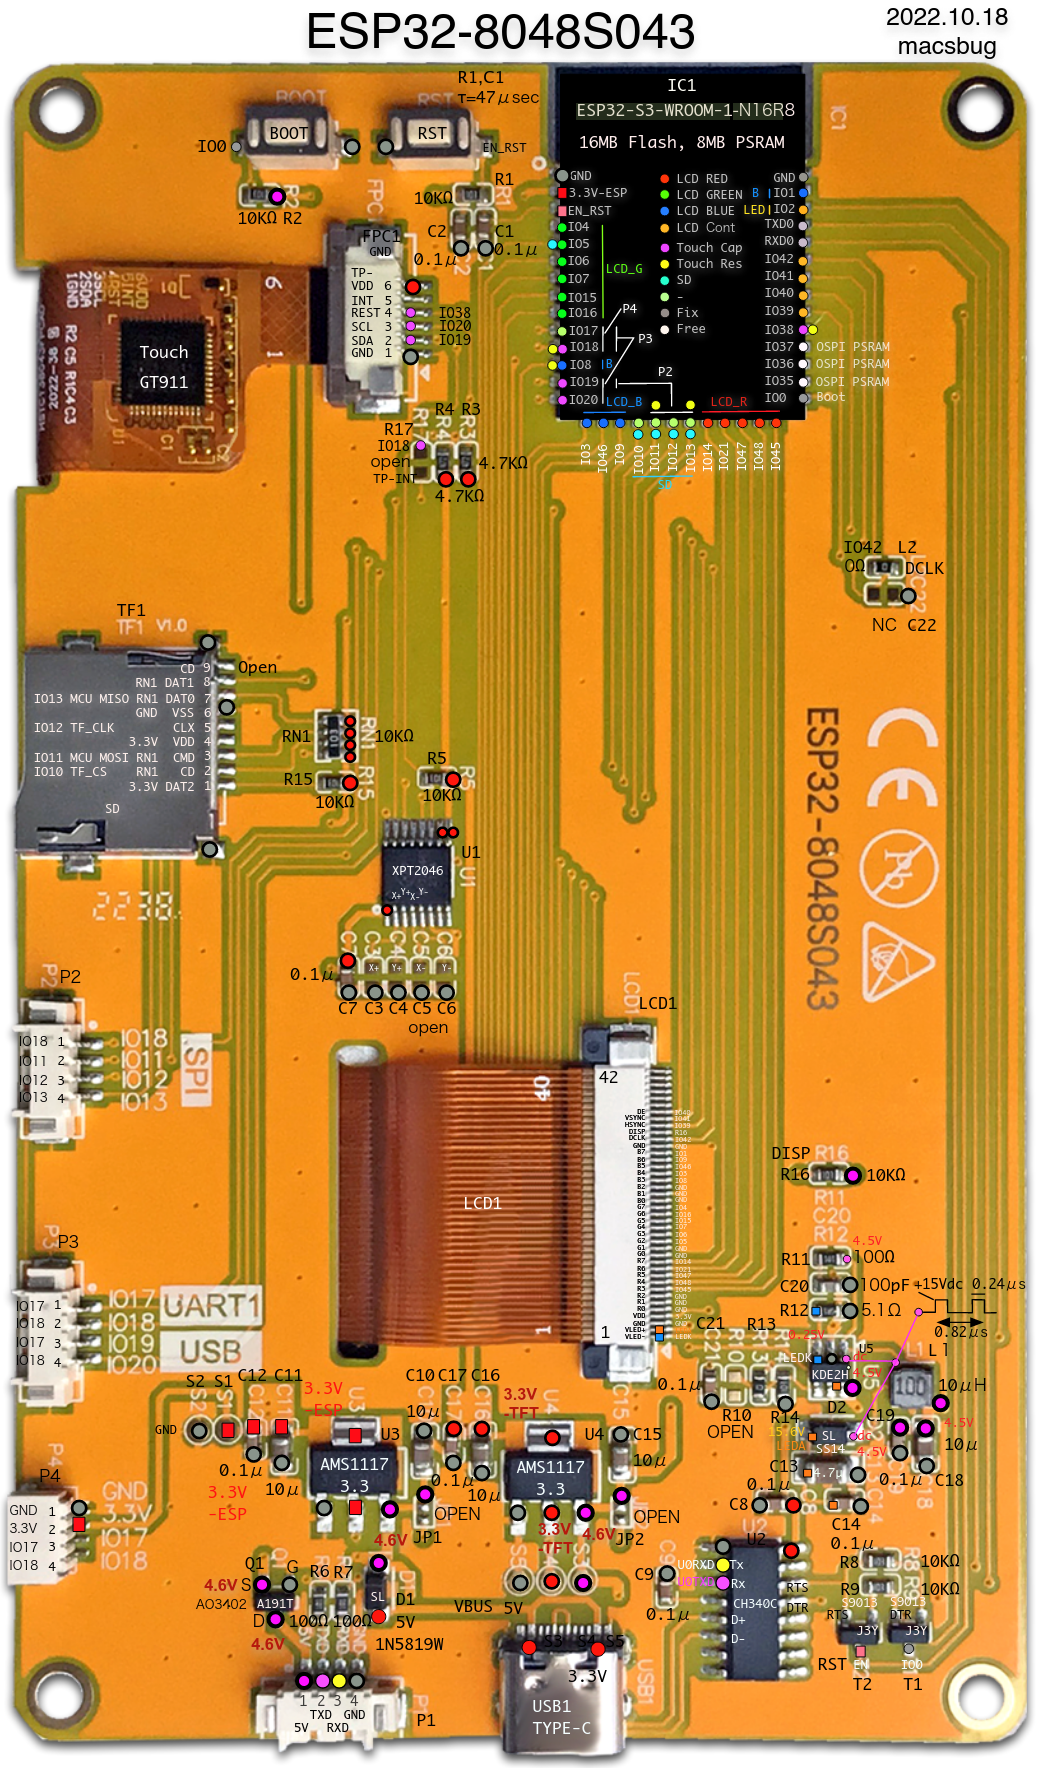
https://macsbug.wordpress.com/2022/11/29/esp32-8048s043/
まず
https://lang-ship.com/blog/work/esp32-8048s043/
を参考にビルドから
ArduinoIDEでライブラリの管理からPSRamのたなかまさゆきさんビルドのライブラリを入れる.
次にToolからBoardを選ぶが,
ESP32 Aruinoで
ESP32-S3-DevではなくPSRAMを使うために
ESP32-S3-Boxを選ぶ.
あと上記ページのプラットフォームボタンから
esp32s3box.json
を.inoと同一フォルダに格納.
https://github.com/lovyan03/LovyanGFX/blob/0.5.0/src/lgfx_user/LGFX_ESP32S3_RGB_ESP32-8048S043.h
より
LGFX_ESP32S3_RGB_ESP32-8048S043.h
をこれも同一フォルダに格納.
そして
https://lang-ship.com/blog/work/esp32-8048s043/#toc4
のシンプルスケッチ例を基板に送るが,エラーとなる.(⇒今ここ)
https://macsbug.wordpress.com/2022/11/29/esp32-8048s043/